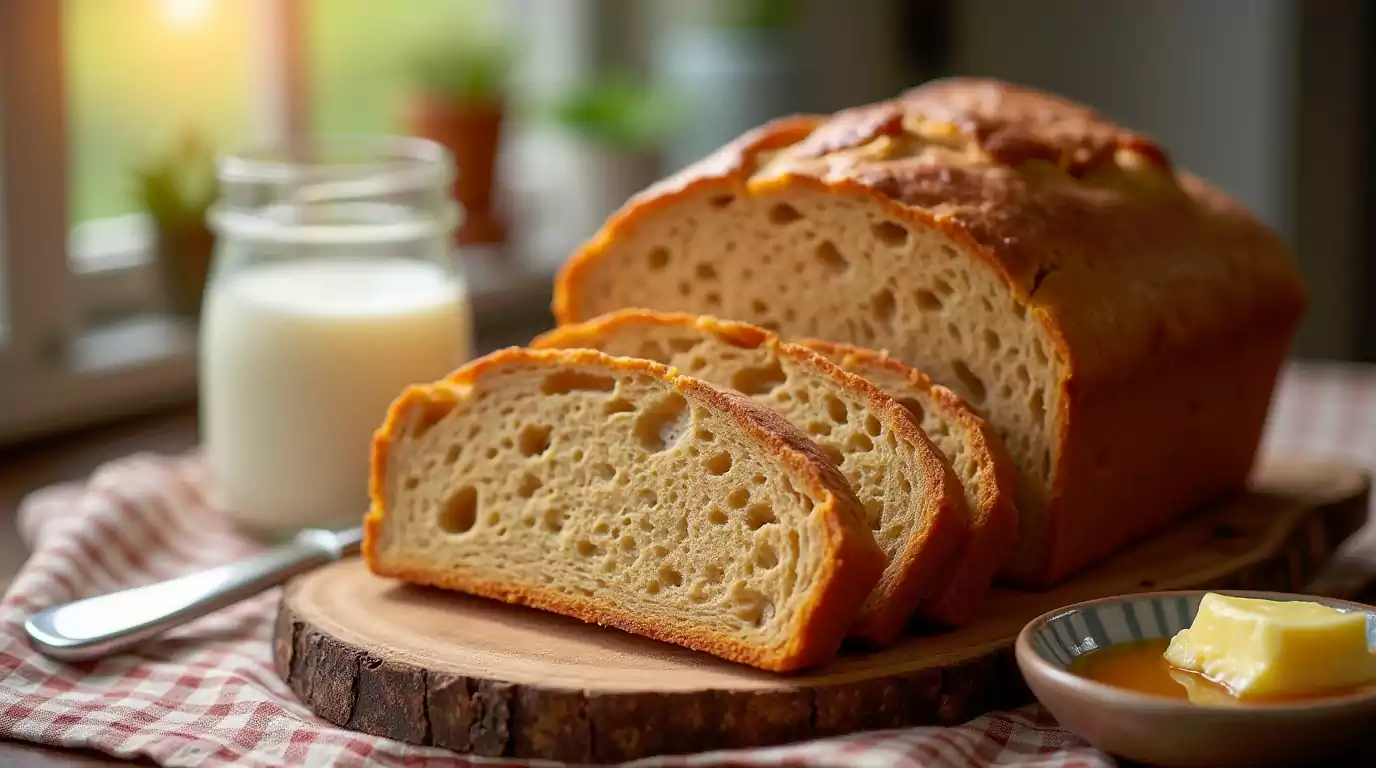
There’s nothing quite like the aroma of freshly baked bread filling your kitchen. If you love soft, flavorful bread with a hint of natural sweetness, then honey wheat bread is a perfect choice. Not only is it delicious, but it’s also a healthier alternative to store-bought white bread, thanks to the wholesome goodness of whole wheat flour and the natural sweetness of honey.
Making homemade honey wheat bread may seem intimidating, but with the right ingredients and techniques, you can bake a soft, fluffy loaf right in your own kitchen—no professional baking skills required. Whether you’re a seasoned baker or a beginner, this guide will walk you through each step of the process, from mixing the dough to achieving that perfectly golden crust.
Ready to learn how to make the best honey wheat bread at home? Let’s get started.
Why You Should Make Honey Wheat Bread at Home
Health Benefits of Honey Wheat Bread
Homemade honey wheat bread is packed with nutrients that make it a healthier choice compared to regular white bread. Whole wheat flour contains fiber, which supports digestion and helps regulate blood sugar levels. Honey, a natural sweetener, offers antioxidants and antimicrobial properties, making it a great alternative to processed sugars.

Better Taste and Freshness
Nothing compares to the taste of freshly baked bread. Store-bought bread often contains preservatives and artificial flavors, which can alter the taste and texture. Homemade honey wheat bread, on the other hand, is free from additives, ensuring a fresh and natural flavor in every bite.
Cost-Effective and Customizable
Baking your own bread is not only cost-effective but also allows you to customize the recipe to suit your dietary needs. You can experiment with different types of flour, adjust the sweetness, or even add nuts and seeds for extra texture and nutrition.
Essential Ingredients and Tools for Perfect Honey Wheat Bread
Key Ingredients
To make the best honey wheat bread, you’ll need the following ingredients:

- Whole wheat flour – Provides a rich, nutty flavor and is packed with fiber. It gives the bread a hearty texture and enhances its nutritional value.
- All-purpose flour – Helps balance the density of whole wheat flour for a lighter texture. While you can use 100% whole wheat flour, adding some all-purpose flour makes the bread softer and easier to work with.
- Honey – Acts as a natural sweetener and enhances moisture retention. It also helps with browning and adds a subtle sweetness without making the bread overly sugary.
- Active dry yeast – A crucial ingredient for the rising process. Yeast ferments the sugars in the flour and honey, creating carbon dioxide that makes the bread light and airy.
- Warm water – Activates the yeast and helps form the dough. The water should be between 100-110°F (37-43°C) to ensure proper yeast activation.
- Butter or oil – Adds moisture and improves the texture of the bread. Butter gives a richer flavor, while oil (such as olive or vegetable oil) results in a slightly chewier texture.
- Salt – Enhances the flavor and helps regulate yeast activity. Without salt, the bread may rise too quickly and lack depth in taste.
Tools You’ll Need
Having the right tools makes the baking process easier and more efficient:
- Mixing bowls – Essential for combining and proofing the dough. Use a large bowl to allow room for the dough to rise.
- Measuring cups and spoons – Ensures accuracy in ingredient proportions. Proper measurements lead to consistent results.
- Stand mixer (optional) – Helps with kneading if you prefer not to do it by hand. A dough hook attachment makes the process easier and ensures even kneading.
- Bread pan – Shapes the dough into a traditional loaf. A standard 9×5-inch loaf pan works well for most bread recipes.
- Oven thermometer – Ensures your oven is at the right temperature. Ovens can sometimes be off by 10-20 degrees, so checking the actual temperature helps prevent under- or overbaking.
- Dough scraper or bench knife – Useful for handling and shaping the dough. It helps lift sticky dough without adding too much extra flour.
- Pastry brush – If you want to add a honey glaze or brush the top with butter for extra shine, a pastry brush is a handy tool.
- Cooling rack – Allows the bread to cool evenly, preventing sogginess from trapped steam.
Ingredient Substitutions
If you have dietary restrictions or prefer alternatives, consider these substitutions:
- Maple syrup or agave nectar instead of honey – These alternatives provide a similar level of sweetness and moisture.
- Coconut oil or olive oil instead of butter – Both options work well to keep the bread moist while offering different flavor profiles.
- Gluten-free flour blend for a gluten-free version – If using gluten-free flour, consider adding xanthan gum to help with structure and elasticity.
- Milk instead of water – Using milk instead of water can add richness and softness to the bread.
- Instant yeast instead of active dry yeast – If using instant yeast, you can skip the activation step and mix it directly with the dry ingredients.
By selecting high-quality ingredients and using the right tools, you can ensure that your honey wheat bread turns out perfect every time. Paying attention to ingredient proportions, kneading techniques, and baking conditions will result in a soft, flavorful loaf that’s both healthy and delicious.
Step-by-Step Guide to Making Honey Wheat Bread
Step 1: Preparing the Dough

- In a large mixing bowl, combine warm water and honey. Stir until the honey dissolves.
- Sprinkle the yeast over the mixture and let it sit for 5-10 minutes until it becomes frothy.
- Add melted butter, whole wheat flour, all-purpose flour, and salt. Mix until a dough forms.
- Knead the dough on a floured surface for 8-10 minutes until it becomes smooth and elastic.
Step 2: First Rise and Shaping
- Place the dough in a greased bowl, cover it with a clean towel, and let it rise in a warm place for about 1 hour or until doubled in size.
- Punch down the dough and shape it into a loaf.
- Transfer the dough to a greased bread pan, cover, and let it rise for another 30-45 minutes.
Step 3: Baking to Perfection

- Preheat your oven to 375°F (190°C).
- Place the loaf in the oven and bake for 30-40 minutes until golden brown.
- Tap the top of the loaf; if it sounds hollow, it’s done.
- Remove from the oven and let it cool on a wire rack before slicing.
Tips for the Best Soft and Fluffy Honey Wheat Bread
How to Achieve a Soft Texture
- Use warm water (not too hot) to properly activate the yeast.
- Knead the dough thoroughly to develop gluten, which creates a soft crumb.
- Allow the dough to rise in a warm, draft-free environment.
Common Mistakes to Avoid
- Using too much flour – This can result in dry, dense bread.
- Not kneading enough – Leads to a dense and heavy loaf.
- Overproofing or underproofing – Affects the final texture and rise of the bread.
Storing and Freezing Bread
- Store at room temperature in an airtight container for up to 5 days.
- For longer storage, slice the bread and freeze it in a resealable bag.
- Reheat slices in a toaster or oven to restore freshness.
Frequently Asked Questions
Can I Make Honey Wheat Bread Without Yeast?
Yes, you can use baking powder or baking soda as a leavening agent, but the texture will be denser.
How Can I Make This Bread Vegan?
Replace butter with olive oil or coconut oil and use a plant-based sweetener instead of honey.
What’s the Best Way to Store Homemade Bread?
Store in an airtight container at room temperature for short-term use or freeze slices for long-term storage.
Can I Use a Bread Machine for This Recipe?
Yes, simply add the ingredients to your bread machine in the order recommended by the manufacturer and use the whole wheat bread setting.
Conclusion
Making honey wheat bread at home is a rewarding experience that allows you to enjoy fresh, nutritious, and delicious bread without any artificial ingredients. By following this step-by-step guide, you’ll be able to bake a soft and flavorful loaf that’s perfect for sandwiches, toast, or simply enjoying with butter and honey.
Try out this Honey Wheat Bread and let your creativity shine! We’d love to see your sweet creations. Tag us on Instagram at @SweetEatsRecipes and use the hashtag #HoneyWheatBread to get featured.
Honey Wheat Bread
Equipment
- Mixing bowls
- Measuring Cups & Spoons
- Stand mixer (optional)
- Bread Pan (9×5 inch)
- Oven Thermometer
- Dough scraper
- Pastry brush
- Cooling rack
Ingredients
- 2 ½ cups Whole Wheat Flour
- 1 cup All-Purpose Flour
- 2 ¼ teaspoons Active Dry Yeast (1 packet)
- 1 cup Warm Water (100-110°F)
- 3 tablespoons Honey
- 2 tablespoons Butter (melted) or Olive Oil
- 1 teaspoon Salt
Instructions
- Activate the Yeast: In a large mixing bowl, combine warm water and honey. Stir until the honey dissolves. Sprinkle the yeast over the mixture and let it sit for 5-10 minutes until foamy.
- Mix the Dough: Add melted butter, whole wheat flour, all-purpose flour, and salt. Stir until a dough forms.
- Knead the Dough: Transfer the dough to a floured surface and knead for 8-10 minutes until smooth and elastic.
- First Rise: Place the dough in a greased bowl, cover with a clean towel, and let it rise for about 1 hour or until doubled in size.
- Shape the Loaf: Punch down the dough, shape it into a loaf, and transfer it to a greased bread pan. Cover and let it rise for another 30-45 minutes.
- Bake: Preheat the oven to 375°F (190°C). Bake for 30-40 minutes until golden brown. Tap the loaf; if it sounds hollow, it’s done.
- Cool and Serve: Remove the bread from the pan and let it cool on a wire rack before slicing.
Notes
- For a softer texture, replace some of the water with milk.
- Store at room temperature for up to 5 days or freeze slices for longer storage.
- Experiment with seeds or nuts for added texture.


