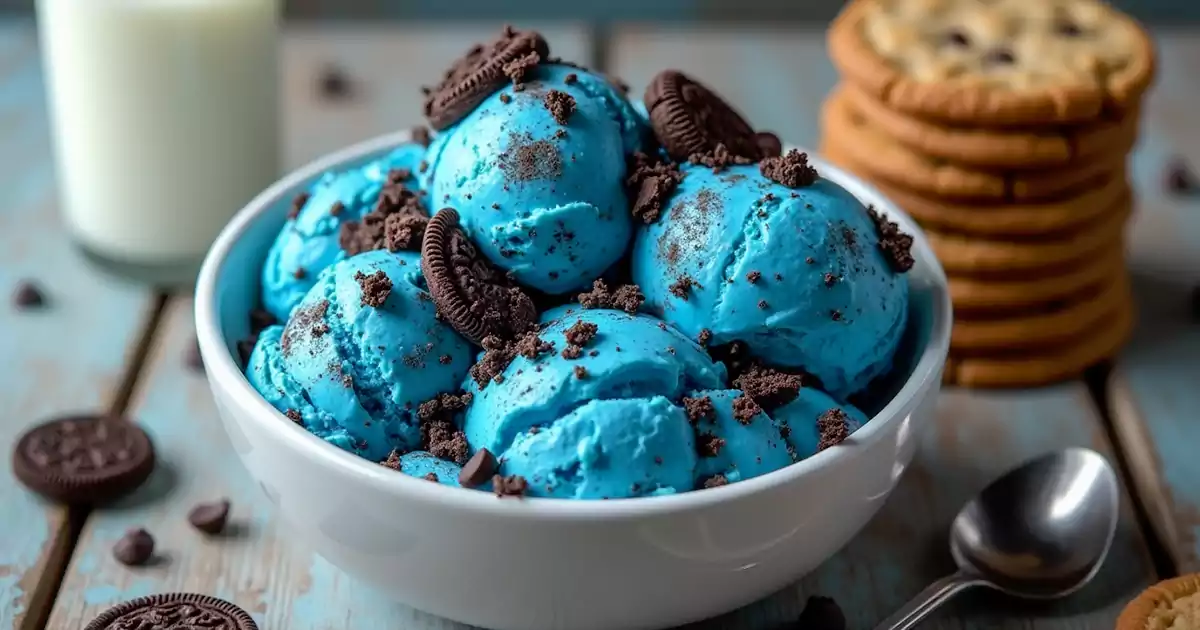
If you’re a fan of fun, colorful desserts, then Cookie Monster ice cream is a must-try. Inspired by the beloved Sesame Street character, this vibrant blue treat is packed with chunks of Oreos and chocolate chip cookies, making it a dream for cookie lovers.
The best part? You don’t need an ice cream maker to whip up this delicious, no-churn Cookie Monster ice cream right at home. With just a few simple ingredients like heavy cream, condensed milk, vanilla extract, and blue food coloring, you can create a creamy, flavorful dessert that’s perfect for kids and adults alike.
In this guide, we’ll walk you through an easy, step-by-step recipe, share expert tips for the best texture and flavor, and answer common questions about making this viral blue ice cream. Get ready to indulge in a sweet treat that looks as good as it tastes.
What Is Cookie Monster Ice Cream?

Cookie Monster ice cream is a fun and colorful dessert inspired by the beloved Sesame Street character, Cookie Monster. Known for his love of cookies, Cookie Monster would surely approve of this ice cream flavor, which is packed with crushed Oreos and chocolate chip cookies. What makes this ice cream stand out is its bright blue color, mimicking the character’s signature fur while delivering a rich, creamy, and cookie-loaded taste.
The Inspiration Behind Cookie Monster Ice Cream
This unique ice cream flavor has gained popularity in ice cream shops, social media, and home kitchens because of its playful look and delicious taste. It’s often featured as a favorite among kids, but let’s be honest—cookie lovers of all ages enjoy it just as much. Unlike traditional cookies and cream ice cream, which mainly includes crushed Oreos in a vanilla base, Cookie Monster ice cream takes it up a notch by incorporating both Oreos and chocolate chip cookies for an extra indulgent experience.
Key Ingredients That Make It Special
The main elements that give this ice cream its signature taste and appearance include:
- A creamy vanilla base – Typically made with heavy cream, condensed milk, and vanilla extract, giving the ice cream a smooth, rich flavor.
- Bright blue food coloring – This is what transforms the ice cream into its iconic Cookie Monster look. A few drops of blue gel or liquid food coloring are all you need.
- Oreos and chocolate chip cookies – Instead of just one type of cookie, this ice cream combines both, making every bite full of crunchy, chocolatey goodness.
Flavor Profile: What Does It Taste Like?
Despite its eye-catching blue appearance, Cookie Monster ice cream doesn’t have an unusual or artificial taste. The base is a sweet, creamy vanilla flavor, while the mix-ins provide a balance of chocolatey crunch and cookie dough-like texture. The combination of Oreos and chocolate chip cookies adds depth, giving each scoop a satisfying blend of creaminess, crunch, and a hint of chocolate.
Why People Love It
Cookie Monster ice cream has become a favorite because it’s not only visually appealing but also incredibly delicious. The mix of cookies provides a nostalgic, comforting taste that reminds people of classic childhood treats. Whether enjoyed in a cone, a bowl, or topped with extra cookies and whipped cream, this ice cream is a fun and indulgent dessert that never fails to impress.
Ingredients Needed for Homemade Cookie Monster Ice Cream
Making Cookie Monster ice cream at home is simple, and the ingredients are easy to find. This recipe uses a no-churn method, meaning you won’t need an ice cream maker. Below, we’ll break down the key ingredients that give this ice cream its signature creamy texture, bright blue color, and delicious cookie-filled flavor.
Main Ingredients
- Heavy Cream – This is the base of the ice cream, providing a rich and creamy texture. Whipping the heavy cream helps create the light, airy consistency needed for no-churn ice cream.
- Sweetened Condensed Milk – Acts as the sweetener and thickener, replacing the need for an egg-based custard like traditional ice cream. It also helps keep the mixture smooth and scoopable.
- Vanilla Extract – Enhances the overall flavor and balances the sweetness of the cookies and condensed milk.
- Blue Food Coloring – This is what gives Cookie Monster ice cream its fun, vibrant blue hue. Gel food coloring is recommended because it produces a more intense color without altering the texture of the ice cream.

Mix-ins for the Cookie Monster Flavor
- Oreos – Crushed Oreos add a rich chocolatey crunch that pairs perfectly with the vanilla base. You can break them into small pieces or leave some chunks for extra texture.
- Chocolate Chip Cookies – Soft or crunchy chocolate chip cookies add an extra layer of sweetness and a homemade touch. Use store-bought cookies or bake your own for a fresh flavor.
Optional Add-ins for Extra Fun
- Sprinkles – Blue, black, or white sprinkles can add a fun decorative touch to the ice cream.
- Whipped Cream – A dollop of whipped cream on top can enhance the presentation and add a light, fluffy texture.
- Chocolate Syrup – Drizzling chocolate syrup over the ice cream adds extra richness and pairs well with the cookie flavors.
Substitutions and Dietary Adjustments
- Dairy-Free Option – Use coconut cream instead of heavy cream and a dairy-free condensed milk alternative.
- Less Sweet Version – Reduce the amount of sweetened condensed milk and add a pinch of salt to balance the sweetness.
- Alternative Cookies – Swap out Oreos and chocolate chip cookies for other cookie varieties like graham crackers, peanut butter cookies, or double chocolate cookies.
Having these ingredients ready will make the process smooth and fun. Next, we’ll walk through the step-by-step process of making Cookie Monster ice cream at home.
Step-by-Step Guide to Making Cookie Monster Ice Cream
Making Cookie Monster ice cream at home is easier than you might think. Whether you’re using an ice cream maker or going with a simple no-churn method, you can achieve a creamy, delicious treat with just a few steps. Follow this detailed guide to create the perfect Cookie Monster ice cream.
Step 1: Preparing the Ice Cream Base

The foundation of this ice cream is a rich and creamy base. To start:
- In a spacious mixing bowl, add the heavy cream. Using a hand mixer or stand mixer, beat the cream on medium-high speed until it forms soft peaks. This process helps create a light and airy texture.
- Once the cream is whipped, add in the sweetened condensed milk and vanilla extract. Gently fold the ingredients together using a spatula to keep the mixture fluffy.
- Add a few drops of blue food coloring and stir until the color is evenly distributed. If you want a deeper blue, add more food coloring gradually. Avoid excessive mixing, as it may cause the whipped cream to lose its light and fluffy texture.
Step 2: Mixing in the Cookies

Now that the base is ready, it’s time to add the cookies that give Cookie Monster ice cream its signature texture and flavor.
- Take a handful of Oreos and chocolate chip cookies and crush them into small chunks. You can do this by placing them in a ziplock bag and crushing them with a rolling pin or breaking them apart by hand.
- Gently fold the crushed cookies into the blue ice cream base, making sure they are evenly distributed. For extra texture, leave some larger cookie chunks.
Step 3: Freezing the Mixture
The next step is to freeze the ice cream so it can set properly.
- No-Churn Method: Pour the mixture into a loaf pan or a freezer-safe container. Smooth the top with a spatula and cover with plastic wrap or a lid to prevent ice crystals from forming. Freeze for at least 4 to 6 hours, or until the ice cream is firm.
- Ice Cream Maker Method: If using an ice cream maker, pour the mixture into the machine and churn according to the manufacturer’s instructions. This typically takes 20 to 30 minutes. Once the ice cream reaches a soft-serve consistency, transfer it to a container and freeze for another 2 to 3 hours to firm up.
Step 4: Serving and Toppings
Once the ice cream is fully frozen, it’s time to serve and enjoy.
- Scoop the ice cream into bowls or cones.
- For extra fun, top it with whipped cream, extra cookie crumbles, sprinkles, or a drizzle of chocolate syrup.
- Serve immediately and enjoy this colorful, delicious treat.
With these simple steps, you’ll have a batch of homemade Cookie Monster ice cream that’s perfect for any occasion. Whether it’s a summer treat, a party dessert, or just a fun weekend project, this ice cream is sure to be a hit.
Tips for the Best Cookie Monster Ice Cream
Making Cookie Monster ice cream at home is easy, but a few expert tips can take it to the next level. Whether you want a creamier texture, a bolder blue color, or the perfect balance of cookie chunks, these tips will help you create the ultimate homemade treat.
Using an Ice Cream Maker vs. No-Churn Method
There are two main ways to make homemade ice cream: with an ice cream maker or using a no-churn method.
- If you have an ice cream maker, you can achieve a smoother, more traditional ice cream texture. The machine churns air into the mixture, making it light and creamy. Simply follow your ice cream maker’s instructions, adding the crushed cookies at the end of the churning process.
- If you’re using a no-churn method, which requires no special equipment, you’ll need to whip heavy cream until stiff peaks form before folding in the condensed milk and other ingredients. This helps trap air, creating a creamy texture without the need for churning.
Both methods work well, but the no-churn method is the easiest and most accessible for home cooks.
Achieving the Perfect Blue Color Without Overpowering Food Dye
The signature blue color of Cookie Monster ice cream is a big part of its appeal, but it’s important not to go overboard with food coloring.
- Gel food coloring works best because it’s more concentrated, meaning you can achieve a rich blue shade without using too much liquid, which could alter the texture of the ice cream.
- Start with a small amount of blue food coloring and gradually add more until you reach the desired shade. Too much food dye can sometimes leave an aftertaste, so moderation is key.
- If you prefer a natural alternative, you can try blue spirulina powder, which provides a similar vibrant color without artificial dyes.
Best Cookie Combinations for Extra Crunch
The combination of Oreos and chocolate chip cookies is what makes Cookie Monster ice cream so irresistible, but there are a few tricks to getting the perfect mix of textures.
- Use a mix of finely crushed and chunky pieces. This ensures you get cookies in every bite while also maintaining a nice crunch.
- Add some cookies just before serving. Some cookies will soften as they sit in the ice cream, so if you like a bit of crunch, stir in a few extra cookie pieces right before serving.
- Experiment with different cookies. While Oreos and chocolate chip cookies are the classic choice, you can also try adding brownie chunks, cookie dough bites, or even white chocolate chips for a fun twist.
How to Store and Serve for the Best Texture
Homemade ice cream can sometimes become too hard after freezing, but there are ways to keep it scoopable and creamy.
- Store it in an airtight container to prevent ice crystals from forming. For optimal freezing, use a broad, shallow container to ensure even cooling.
- Place a layer of plastic wrap directly on the surface of the ice cream before sealing the lid to help prevent freezer burn.
- Let it sit at room temperature for a few minutes before scooping. This makes it easier to serve without melting too quickly.
- Use a warm ice cream scoop to glide through the ice cream smoothly. Simply dip the scoop in warm water before serving.
With these tips, your homemade Cookie Monster ice cream will turn out creamy, flavorful, and perfectly balanced every time. Enjoy this fun, colorful dessert with family and friends, and don’t forget to add extra cookies on top for the ultimate treat.
Frequently Asked Questions
Many people have questions about making homemade Cookie Monster ice cream, from ingredient substitutions to storage tips. Below are some of the most common questions, along with helpful answers to ensure your ice cream turns out perfect every time.
Can I make this recipe without heavy cream?
Yes, but the texture may be different. Heavy cream helps create a rich, creamy consistency. If you’re looking for an alternative, you can try using full-fat coconut milk or whipping cream. However, coconut milk will give the ice cream a slight coconut flavor. If you want a lighter version, you can use half-and-half, but the ice cream may not be as thick and creamy.
How long does homemade Cookie Monster ice cream last?
When stored properly in an airtight container, homemade Cookie Monster ice cream can last up to two weeks in the freezer. To prevent ice crystals from forming, press a piece of plastic wrap directly onto the surface of the ice cream before sealing the container. This helps maintain a smooth and creamy texture.
Can I make a dairy-free version of Cookie Monster ice cream?
Absolutely! To make a dairy-free version, swap out the heavy cream for full-fat coconut milk and use a dairy-free sweetened condensed milk alternative. You can also replace Oreos and chocolate chip cookies with dairy-free versions, which are available at many grocery stores. The taste and texture will still be delicious, and it’s a great option for those who are lactose intolerant or following a vegan diet.
Do I need an ice cream maker to make this recipe?
No, this recipe is designed to be a no-churn version, which means you don’t need an ice cream maker. Simply whip the heavy cream until stiff peaks form, fold in the condensed milk and other ingredients, and freeze until firm. However, if you do have an ice cream maker, you can use it to churn the mixture for an even creamier texture.
How can I make the ice cream an even brighter blue?
To achieve that signature Cookie Monster blue color, use a high-quality gel food coloring instead of liquid food coloring. Gel food coloring is more concentrated, which means you’ll get a more vibrant color without affecting the texture of the ice cream. Start with a small amount and gradually add more until you reach your desired shade of blue.
Can I add other mix-ins to this ice cream?
Yes! While Oreos and chocolate chip cookies are the traditional mix-ins for Cookie Monster ice cream, you can get creative by adding mini marshmallows, cookie dough chunks, or even M&M’s for extra texture and flavor. Just be sure not to overload the ice cream with too many mix-ins, as this can affect the overall consistency.
Conclusion
Making Cookie Monster ice cream at home is a fun and easy way to enjoy a colorful, cookie-filled treat that everyone will love. With just a few simple ingredients and no ice cream maker required, you can create a creamy, delicious dessert packed with the perfect combination of Oreos and chocolate chip cookies.
Whether you’re making it for a kids’ party, a summer treat, or just because you love blue ice cream, this recipe is sure to be a hit. Plus, with options for dairy-free alternatives and extra mix-ins, you can customize it to fit your preferences.
Try out this Cookie Monster ice cream and let your creativity shine! We’d love to see your sweet creations. Tag us on Instagram at @SweetEatsRecipes and use the hashtag #CookieMonstericecream to get featured.
Cookie Monster Ice Cream
Equipment
- Mixing Bowl
- Hand mixer
- Spatula
- Loaf pan or container
- Plastic wrap
Ingredients
- 2 cups Heavy cream
- 1 can Sweetened condensed milk
- 1 tsp Vanilla extract
- 5-6 drops Blue food coloring
- 8 Oreo cookies
- ½ cup Chocolate chip cookies
Instructions
- In a large mixing bowl, whip the heavy cream with a hand mixer until stiff peaks form.
- Gently fold in the sweetened condensed milk and vanilla extract until combined.
- Add blue food coloring, a few drops at a time, and mix until you achieve your desired color.
- Fold in crushed Oreos and chocolate chip cookies, distributing evenly.
- Pour the mixture into a loaf pan or airtight container.
- Cover with plastic wrap, pressing it gently against the surface to prevent ice crystals.
- Freeze for at least 6 hours or overnight until firm.
- Scoop and serve with extra cookie toppings if desired.
Notes
- You can use dairy-free alternatives like coconut milk and dairy-free cookies for a vegan version.
- If you prefer a churned version, use an ice cream maker instead of the no-churn method.
- Store in an airtight container for up to two weeks.