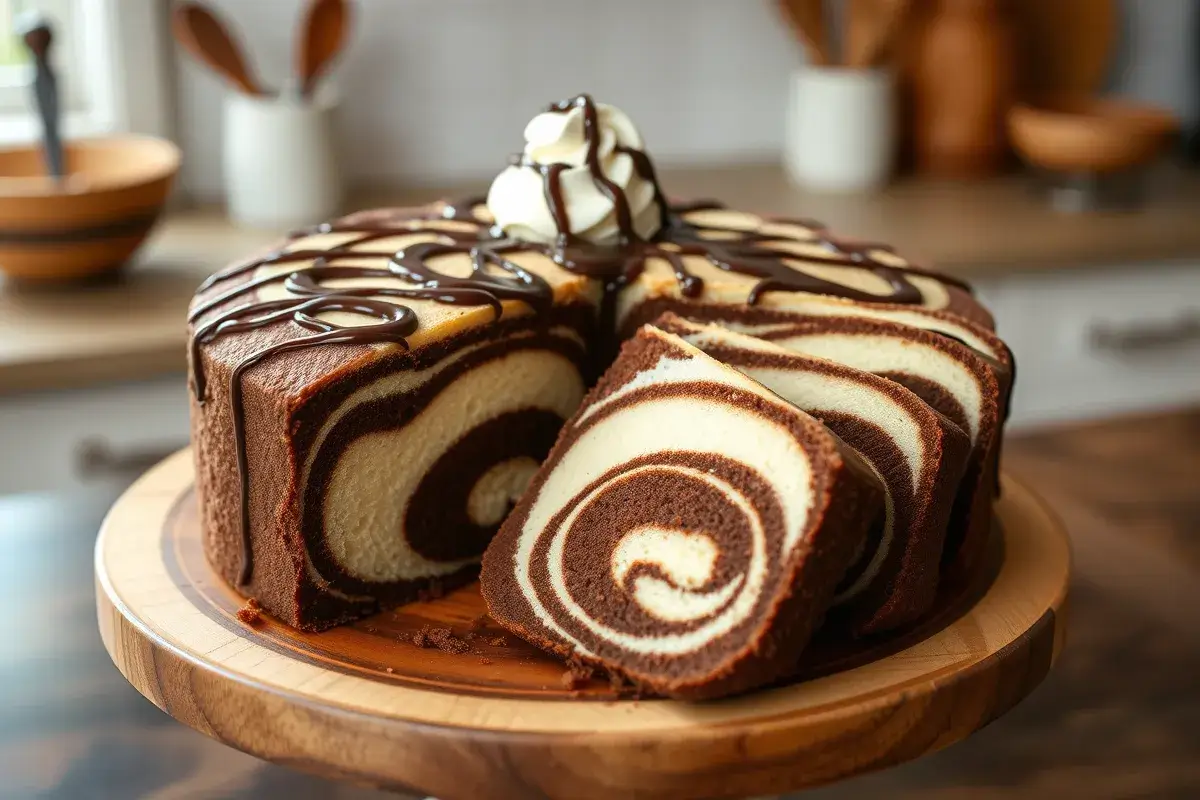
If you’ve ever seen the delightful striped pattern of a zebra cake, you know it’s as fun to look at as it is to eat. The classic zebra cake combines rich chocolate and fluffy vanilla layers, creating a visually stunning dessert that’s perfect for any occasion. But what’s even better than enjoying a store-bought zebra cake? Making it yourself! In this step-by-step guide, we’ll show you how to make zebra cakes at home from scratch. Whether you’re an experienced baker or a beginner in the kitchen, this recipe is easy to follow and guarantees a delicious, show-stopping cake with a perfect swirl pattern. Grab your mixing bowls, and let’s dive into the world of homemade zebra cakes!
What Are Zebra Cakes?
Zebra cakes are a visually captivating dessert known for their striking striped pattern that alternates between rich chocolate and light vanilla layers. This eye-catching design is achieved by carefully layering two different flavored batters, creating a stunning “zebra” effect when sliced. Not only do zebra cakes stand out with their bold, alternating stripes, but they also offer a delightful balance of flavors, with the sweet vanilla complemented by the deep richness of cocoa.
What Makes Zebra Cakes Unique?
The true charm of zebra cakes lies in their distinctive appearance and flavor combination. The alternating vanilla and chocolate batter creates a visually appealing striped design, making each slice a mini work of art. The cake itself is moist and fluffy, offering a balanced sweetness that both chocolate and vanilla lovers can appreciate. The contrast in flavors and the swirling design make zebra cakes a fun, visually interesting alternative to more traditional layered cakes. Whether you’re baking for a birthday party, a family gathering, or just for yourself, zebra cakes are a great way to impress your guests and satisfy your sweet tooth.
Why Make Them at Home?
While zebra cakes are often sold in stores as pre-packaged snacks, making them at home comes with a number of benefits. When you bake zebra cakes yourself, you have full control over the ingredients, ensuring that the cake is as fresh and flavorful as possible. Homemade zebra cakes can be customized to your liking—whether you prefer a more intense chocolate flavor, lighter vanilla, or even experimenting with additional ingredients like frosting or chocolate chips. Plus, the fun of layering the batters to create the iconic zebra stripes adds a creative touch to your baking experience. The satisfaction of cutting into a freshly baked, homemade zebra cake is something that store-bought versions simply can’t match.
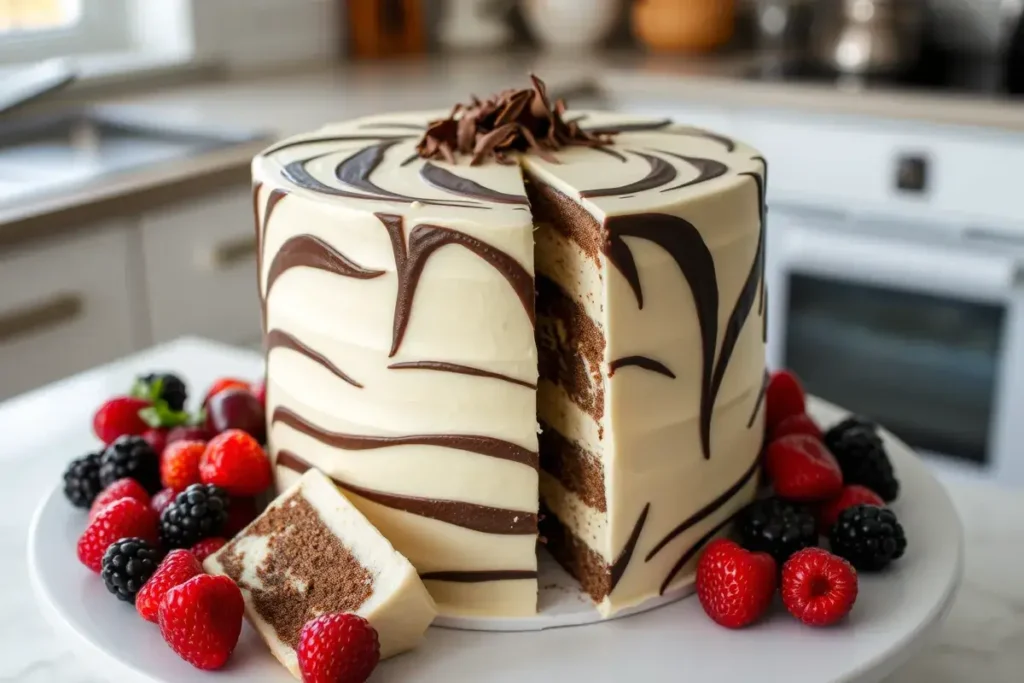
Origins of Zebra Cakes
Zebra cakes are a visually captivating dessert known for their striking striped pattern that alternates between rich chocolate and light vanilla layers. This eye-catching design is achieved by carefully layering two different flavored batters, creating a stunning “zebra” effect when sliced. Not only do zebra cakes stand out with their bold, alternating stripes, but they also offer a delightful balance of flavors, with the sweet vanilla complemented by the deep richness of cocoa.
Ingredients and Tools You’ll Need
Making the perfect zebra cake starts with having the right ingredients and tools. By ensuring you have everything ready before you begin, you’ll set yourself up for success and enjoy a smooth baking experience. Let’s go over all the essential items you’ll need to create this delicious treat, from the basics of the cake batter to the tools that will help you achieve those perfect layers.
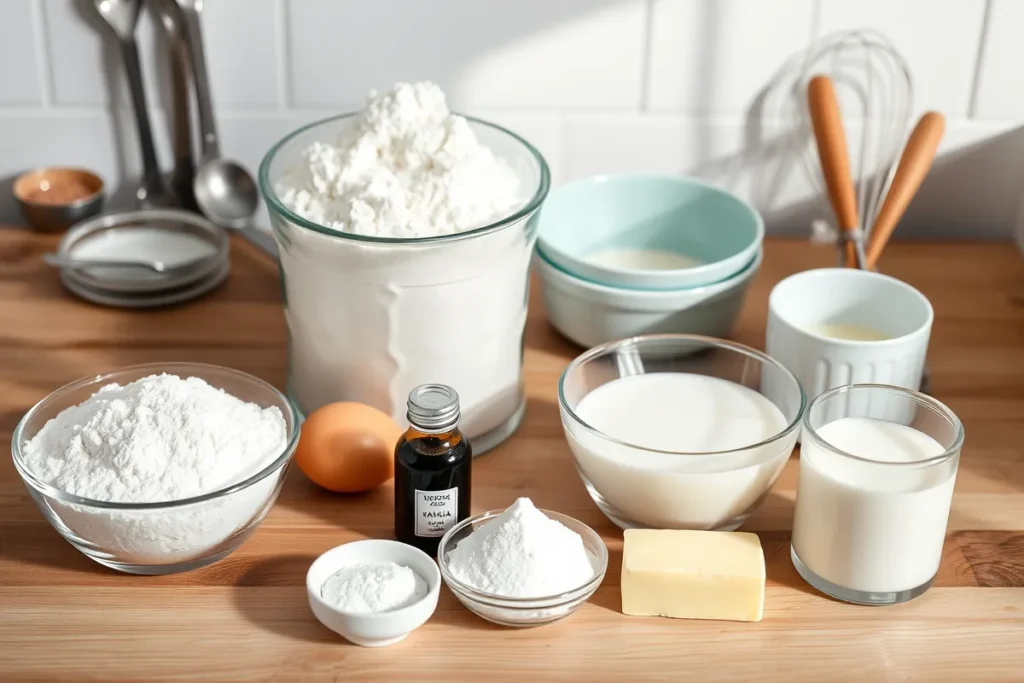
Essential Ingredients for Zebra Cakes
The key to a great zebra cake lies in using fresh, high-quality ingredients. The perfect balance between the chocolate and vanilla layers is what makes this cake truly stand out. Here’s a detailed list of the ingredients you’ll need:
- All-Purpose Flour
- 2 ½ cups of all-purpose flour is essential to give your cake the perfect structure. Make sure to measure the flour properly by spooning it into the measuring cup and leveling it off for the most accurate amount.
- Granulated Sugar
- 2 cups of granulated sugar will give your zebra cake the right amount of sweetness. This will help balance the richness of the cocoa and add moisture to the cake.
- Baking Powder
- 2 ½ teaspoons of baking powder will help the cake rise and become light and fluffy. Be sure to use fresh baking powder for the best results.
- Cocoa Powder
- ½ cup of unsweetened cocoa powder is crucial for the chocolatey stripes in your zebra cake. Make sure you use high-quality cocoa for the best flavor.
- Salt
- ½ teaspoon of salt enhances the sweetness of the cake and balances the flavors.
- Whole Milk
- 1 cup of whole milk will give your cake its moist texture. For a creamier taste, you can substitute with buttermilk, but whole milk is the classic choice.
- Vegetable Oil
- ½ cup of vegetable oil keeps the cake tender and moist. You can use other oils like canola oil, but vegetable oil provides the ideal texture.
- Large Eggs
- 4 large eggs help bind the ingredients together and add moisture. Room temperature eggs are best for even mixing.
- Vanilla Extract
- 2 teaspoons of pure vanilla extract will add depth to the flavor of the vanilla batter. Always choose pure vanilla extract for the best taste.
- Boiling Water
- ½ cup of boiling water is added to the cocoa powder to make a smooth, chocolate batter that is easy to swirl with the vanilla batter.
- Optional: Butter
- For greasing your pan, you can use 1-2 tablespoons of butter or oil to ensure the cake doesn’t stick. You can also use parchment paper as an extra layer of protection.
Must-Have Tools for Perfect Results
Having the right tools is crucial when baking zebra cakes, as they help ensure everything comes out perfectly, from the cake’s texture to its beautiful striped pattern.
- Mixing Bowls
- You’ll need at least two large mixing bowls: one for the chocolate batter and one for the vanilla batter. Make sure they are large enough to accommodate all the ingredients without spilling.
- Whisk or Electric Mixer
- A whisk is great for mixing the dry ingredients, but for the best results, especially when it comes to beating the eggs and oil, an electric mixer (stand or hand-held) is a real time-saver. It helps ensure the batter is smooth and fluffy.
- Measuring Cups and Spoons
- Accurate measurements are key when baking. Be sure to have standard measuring cups and spoons to measure your flour, sugar, cocoa powder, milk, and other ingredients precisely.
- Spatula or Rubber Scraper
- A rubber spatula will help you scrape the batter from the sides of the bowl, ensuring all your ingredients are incorporated evenly. It’s especially useful when dividing the batter between bowls for the chocolate and vanilla sections.
- 9-Inch Round Cake Pans
- Two 9-inch round cake pans are perfect for this recipe. Be sure to grease and line them with parchment paper for easy removal of the cakes after baking.
- Cooling Rack
- A cooling rack is essential for allowing the zebra cakes to cool evenly and completely before frosting or serving. This helps prevent the cakes from becoming soggy at the bottom.
- Offset Spatula or Knife (for Swirling)
- An offset spatula is ideal for spreading the batters evenly in the pan. You can also use a knife to swirl the batters together and create the signature zebra pattern. Gently swirl in a figure-eight pattern to achieve the best effect.
- Frosting Tools (Optional)
- If you plan to frost your zebra cake, a piping bag with decorative tips can help you create beautiful designs. Alternatively, you can use a simple butter knife or offset spatula for smooth frosting application.
With these ingredients and tools ready, you’re all set to create a show-stopping zebra cake at home. The ingredients are simple and easy to find, and the right tools will ensure your cake turns out perfectly every time. Now that you’re prepared, let’s move on to the next section: Step-by-Step Instructions to Make Zebra Cakes!
Step-by-Step Instructions to Make Zebra Cakes
Making zebra cakes at home may sound challenging, but it’s actually a fun and straightforward process. By following these easy steps, you’ll achieve the iconic alternating layers of chocolate and vanilla batter, resulting in a visually appealing and delicious dessert. Here’s how to do it:
Step 1: Preparing the Batter
The first step in creating your zebra cakes is preparing the two separate batters—one vanilla and one chocolate. Both batters are simple to make, but it’s important to follow the recipe accurately for the perfect texture and consistency.
- Vanilla Batter: Start by creaming together butter and sugar until the mixture is light and fluffy. Add in eggs and vanilla extract, mixing well. In a separate bowl, sift together the dry ingredients (flour, baking powder, and a pinch of salt), and gradually add them to the wet ingredients, alternating with milk. This ensures a smooth, lump-free batter.
- Chocolate Batter: For the chocolate batter, follow the same process as the vanilla batter but with the addition of cocoa powder. Sift the cocoa powder along with the dry ingredients to avoid any lumps. Once combined, the chocolate batter will have a rich, velvety texture.
Step 2: Creating the Zebra Pattern
Now comes the fun part: creating the signature zebra swirl. The key to getting perfect zebra stripes is alternating between the chocolate and vanilla batters.
- Layering the Batter: Grease and flour your cake pans to ensure the cakes come out easily. Start by spooning a large dollop of the vanilla batter into the center of the pan. Then, add a scoop of the chocolate batter right on top of the vanilla. Continue alternating, adding spoonfuls of batter in the center each time, without spreading it. This will allow the batters to naturally spread out and create a circular, layered pattern as they bake.
- Swirling the Batter: If you want a more defined swirl, use a skewer, toothpick, or butter knife to gently swirl through the batter in a figure-eight or spiral motion. Be careful not to overmix, as the goal is to have distinct stripes rather than a completely blended color.
Step 3: Baking and Cooling
Now that your zebra cake is ready, it’s time to bake and achieve the perfect texture.
- Baking: Preheat your oven to the temperature specified in your recipe (typically around 350°F or 175°C). Place your cake pans in the oven and bake for the recommended time, usually between 25 to 35 minutes, depending on the size of the pans. You’ll know the cake is done when a toothpick inserted into the center comes out clean.
- Cooling: Once baked, remove the cakes from the oven and let them cool in the pans for about 10 minutes. Then, transfer the cakes to a wire rack to cool completely. Cooling is an essential step—if you try to frost or serve the cakes while they are still warm, the frosting may melt or the cake may break apart.
By following these steps carefully, you’ll have beautifully striped zebra cakes with a moist and fluffy texture that’s sure to impress! Would you like suggestions on decorating or frosting options to complete the look?
Tips for Perfect Zebra Cakes
Making a zebra cake at home is a fun and rewarding experience, but achieving that perfect swirl pattern and a soft, moist texture requires a few tips and tricks. Here are some essential pointers to help you bake the perfect zebra cake every time:
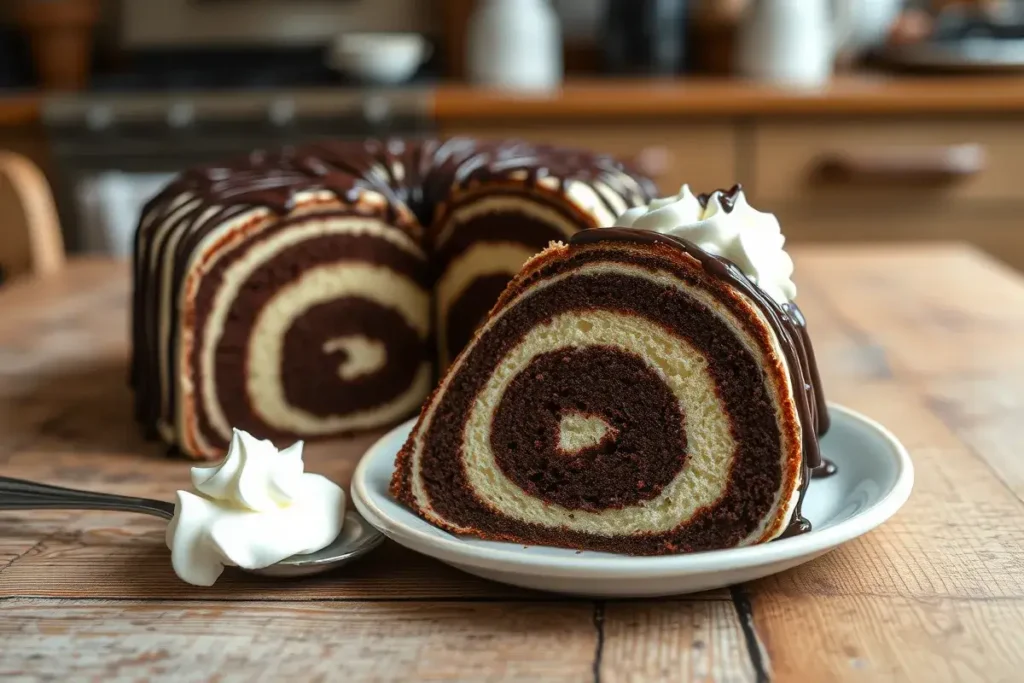
1. Achieving the Ideal Swirl Effect
The signature feature of zebra cakes is the beautiful swirling effect created by alternating chocolate and vanilla batters. To get it just right, follow these tips:
- Use Two Spoons or a Cookie Scoop: Alternate spoonfuls of the chocolate and vanilla batter in the center of the cake pan. Start by placing a spoonful of vanilla batter, then a spoonful of chocolate batter directly on top. As you continue, the batter will spread out naturally, creating the striped effect.
- Don’t Overdo the Swirling: Once the batters are in the pan, you can swirl them gently with a skewer or knife to enhance the pattern. However, avoid over-mixing, as too much swirling can blend the colors into a muddy brown.
- Layer Gradually: Add one layer at a time, alternating the two batters to maintain an even, consistent pattern. The more precise you are with layering, the more defined your zebra stripes will be.
2. How to Avoid Common Baking Mistakes
There are a few common issues that can occur when baking zebra cakes, but don’t worry—here’s how to avoid them:
- Uneven Layers: If the layers of your zebra cake turn out uneven, it’s usually because the batter has been poured unevenly or hasn’t been layered carefully. Make sure to use a spoon or scoop for consistent portions of each batter. If necessary, gently tap the pan on the counter to level the batter before baking.
- Overbaking: Overbaking can lead to a dry, crumbly cake. Always follow the baking time closely and check for doneness by inserting a toothpick into the center of the cake. If it comes out clean or with a few crumbs attached, the cake is ready.
- Underbaking: On the flip side, underbaking can cause the cake to be too wet or gooey in the middle. Make sure to bake the cake at the correct temperature for the right amount of time. If the cake is jiggling in the middle, it may need a few more minutes in the oven.
3. Customizing Your Zebra Cakes
Once you’ve mastered the classic zebra cake, it’s easy to get creative and make it your own. Here are some fun ideas:
- Flavor Variations: While the classic zebra cake is made with vanilla and chocolate batter, you can experiment by adding other flavors. Try adding a dash of almond extract to the vanilla batter or a bit of coffee powder to the chocolate batter for a richer taste.
- Color Variations: For special occasions, you can swap out the traditional chocolate and vanilla for different colored batters. Add a few drops of food coloring to the vanilla batter to create a vibrant rainbow effect, or use pastel colors for a more subtle look.
- Toppings and Frosting: After your zebra cake has cooled, consider topping it with a glaze, frosting, or whipped cream. A simple chocolate ganache or a light vanilla buttercream can enhance the flavor and make your cake even more indulgent. If you prefer a lighter touch, sprinkle powdered sugar on top or add fresh berries for a refreshing contrast.
4. Ensuring a Moist, Fluffy Texture
A perfect zebra cake isn’t just about looks; it should also have the right texture. Follow these tips to ensure your cake comes out moist and fluffy:
- Use Room Temperature Ingredients: Always use room-temperature eggs, butter, and milk. Cold ingredients can cause the batter to curdle, affecting the cake’s texture. Let your ingredients sit out for about 30 minutes before you start baking.
- Don’t Overmix the Batter: Overmixing can cause the cake to become dense and heavy. Mix the ingredients just until combined—this will keep the batter light and airy, leading to a soft, fluffy cake.
- Add Moisture: If you want an extra moist zebra cake, try adding a tablespoon or two of sour cream or yogurt to the batter. This will help retain moisture and give the cake a tender crumb.
Serving and Storing Zebra Cakes
Once you’ve perfected your homemade zebra cake, it’s time to think about how to serve and store it to ensure it stays fresh and delicious. Here’s everything you need to know to enjoy your zebra cakes at their best!
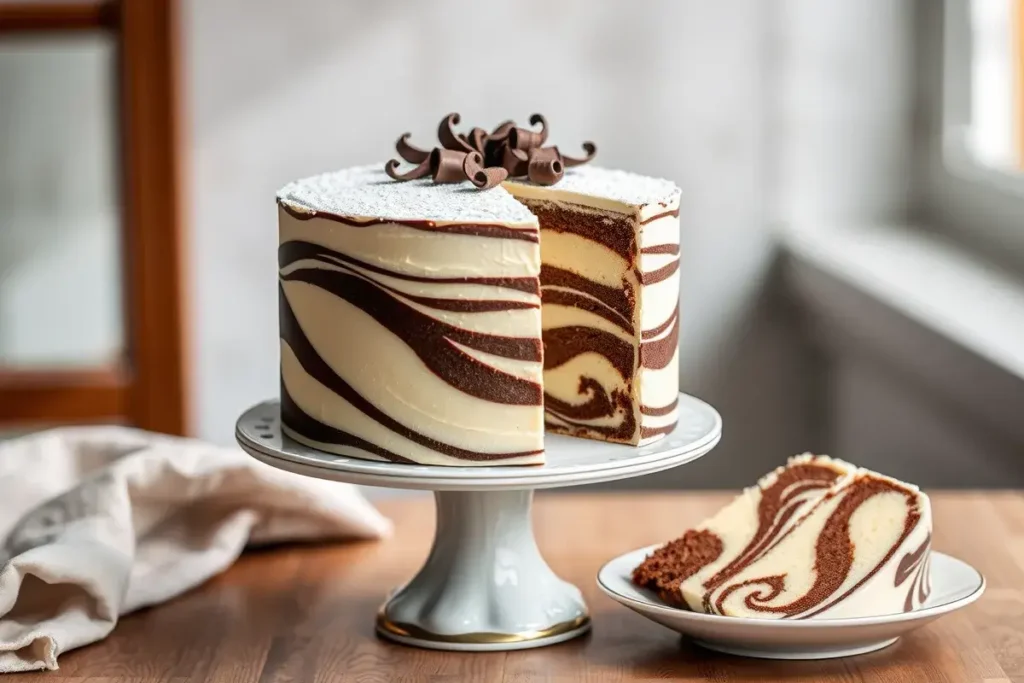
How to Serve Zebra Cakes
Zebra cakes are as eye-catching as they are delicious, making them perfect for a wide variety of occasions. Here are some creative ideas for serving them:
- Serve as Individual Slices
The simplest way to serve zebra cakes is by cutting them into slices. This makes it easy for guests to grab a piece without the need for any additional serving utensils. Pair each slice with a dollop of whipped cream or a drizzle of chocolate or caramel sauce for an added touch of sweetness. - Pair with a Hot Beverage
Zebra cakes go wonderfully with a cup of coffee, tea, or even hot chocolate. The rich layers of chocolate and vanilla pair perfectly with the warmth of these beverages, making it an ideal dessert for colder weather or afternoon tea parties. - Transform Into a Cake for Special Occasions
If you’re hosting a birthday party, baby shower, or holiday gathering, consider transforming your zebra cake into the centerpiece. You can top it with a simple buttercream frosting, sprinkles, or fresh berries to enhance its visual appeal. The striking zebra pattern makes it a showstopper at any event. - Add Ice Cream for Extra Indulgence
For a more decadent treat, serve zebra cake with a scoop of your favorite ice cream. The contrast between the rich, moist cake and the creamy, cold ice cream makes for a delightful combination that will surely impress your guests.
Best Storage Practices
To keep your zebra cakes fresh and maintain their texture, it’s important to store them properly. Here are some tips on how to store your zebra cake so it stays moist and delicious:
- Room Temperature Storage
If you plan to consume your zebra cake within a few days, you can store it at room temperature. Simply place the cake in an airtight container or wrap it tightly with plastic wrap. This will help maintain its moisture and prevent it from drying out. Keep it in a cool, dry place away from direct sunlight or heat sources. - Refrigerating Zebra Cake
If you need to store your zebra cake for a longer period, refrigerating it is the best option. To do this, place the cake in an airtight container or wrap it with plastic wrap and foil to ensure no moisture escapes. Refrigerating the cake can help preserve its freshness for up to a week, though it may slightly affect the texture. Be sure to let it come to room temperature before serving to restore its softness. - Freezing Zebra Cakes
For even longer storage, you can freeze your zebra cake. This is an ideal option if you’ve made a larger cake and want to save some for later. To freeze, wrap the cake tightly in plastic wrap and then in aluminum foil or place it in a freezer-safe bag. Zebra cakes can be frozen for up to 3 months. When you’re ready to eat, allow it to thaw at room temperature or pop it in the microwave for a few seconds to soften it.
Creative Ways to Use Leftovers
If you have leftover zebra cake, don’t let it go to waste! Here are some creative ideas for using any extra cake:
- Zebra Cake Pops
Crumble the leftover zebra cake and mix it with frosting to form cake balls. Insert sticks into the balls and dip them in chocolate or candy coating to create fun and portable zebra cake pops. These are great for parties, gift bags, or snacking. - Zebra Cake Trifle
For a decadent dessert, layer pieces of leftover zebra cake in a glass trifle dish with whipped cream, custard, or fresh fruit. The layers of cake and creamy filling make for a show-stopping dessert that’s both visually appealing and delicious. - Zebra Cake Parfaits
Cut leftover zebra cake into small cubes and layer them with yogurt, fresh fruit, or pudding to create individual parfaits. This is a lighter option that still allows you to enjoy the cake in a new and creative way.
By following these serving and storing tips, you can ensure your zebra cake stays fresh and tasty for as long as possible, and you can even repurpose any leftovers into new, exciting desserts!
Try out this Zebra Cake and let your creativity shine! We’d love to see your sweet creations. Tag us on Instagram at @SweetEatsRecipes and use the hashtag #ZebraCake to get featured.

