There’s something magical about holiday baking, and nothing says Christmas fun quite like Grinch-inspired cookies! These festive treats are not only adorable but also delicious, making them a perfect addition to your holiday celebrations. Whether you’re hosting a Christmas party, baking with your kids, or just looking for a fun activity to embrace the holiday spirit, Grinch cookies are sure to bring a smile to everyone’s face.
In this blog post, we’ll share 10 essential tips for perfecting the best Grinch cookies at home. From achieving the perfect shade of Grinch-green to decorating with heart-shaped sprinkles, we’ll guide you step-by-step to make these cookies a holiday hit. Let’s bring some Grinchy goodness to your baking adventures!
Essential Tools and Ingredients for Grinch Cookies
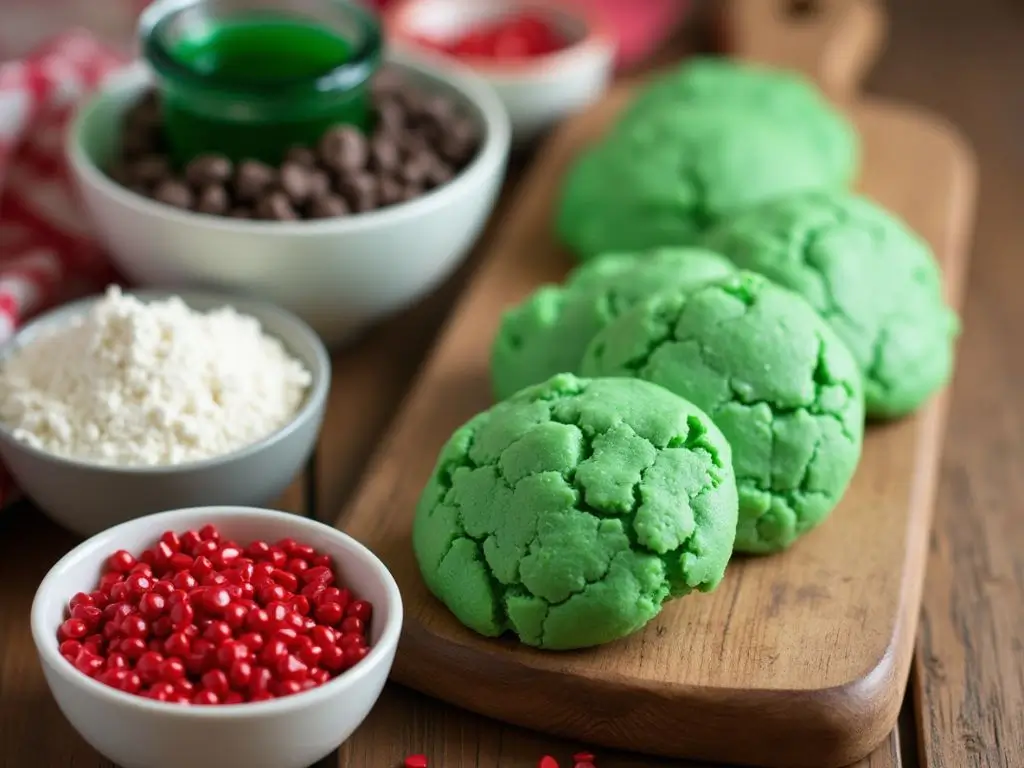
Before you dive into baking the perfect Grinch cookies, it’s essential to gather all the tools and ingredients you’ll need. Having the right equipment and precise measurements ensures your cookies turn out festive, delicious, and just as adorable as you imagined. Here’s everything you’ll need:
Essential Tools
- Mixing Bowls: You’ll need at least two medium to large bowls — one for mixing the dry ingredients and another for the wet ingredients.
- Suggested sizes: 2-quart and 4-quart bowls.
- Electric Mixer: A stand mixer or handheld electric mixer makes creaming the butter and sugar much easier and ensures a smooth, even dough.
- Measuring Cups and Spoons: Accurate measurements are key in baking, so have a full set of measuring cups and spoons ready.
- Measuring cups: ¼ cup, ⅓ cup, ½ cup, and 1 cup.
- Measuring spoons: ¼ tsp, ½ tsp, 1 tsp, and 1 tbsp.
- Rolling Pin: If you plan to roll out the dough for cut-out Grinch shapes, a rolling pin is essential.
- Look for an adjustable rolling pin to maintain an even dough thickness (about ¼ inch).
- Cookie Cutters: While a round cookie cutter works great for classic Grinch cookies, you can also use heart-shaped cutters or a Grinch-shaped stencil for added creativity.
- Baking Sheets: Non-stick or parchment-lined baking sheets are crucial to prevent your cookies from sticking and ensure even baking.
- Recommended size: 13 x 18 inches.
- Silicone Baking Mats or Parchment Paper: These help prevent the cookies from sticking and make cleanup a breeze.
- Piping Bags and Tips: For decorating, have a set of piping bags and small round tips (#2 or #3) to add fine details like facial expressions or outlines.
- Cooling Racks: Allow cookies to cool evenly without becoming soggy on the bottom.
Essential Ingredients
- All-Purpose Flour – 2 ½ cups (310 grams): Provides structure to the cookies. Make sure to spoon and level the flour for accurate measurement.
- Granulated Sugar – 1 cup (200 grams): Sweetens the dough and helps create a tender cookie.
- Unsalted Butter – ¾ cup (170 grams): Ensure the butter is softened to room temperature for easy creaming with sugar.
- Egg – 1 large: Binds the ingredients together and adds moisture to the dough.
- Vanilla Extract – 1 teaspoon: Enhances the flavor of the cookies.
- Baking Powder – 1 teaspoon: Helps the cookies rise slightly and maintain their shape.
- Salt – ½ teaspoon: Balances the sweetness and enhances the overall flavor.
- Green Gel Food Coloring – ½ to 1 teaspoon: Use gel-based food coloring to achieve a vibrant Grinch-green color without thinning the dough.
- Red Heart Sprinkles: These iconic decorations represent the Grinch’s growing heart. Plan for about 1–2 sprinkles per cookie.
- Powdered Sugar – Optional: For dusting or making a light icing if desired.
- Optional Add-ins:
- Almond Extract – ½ teaspoon: Adds a subtle, nutty flavor to the cookies.
- Candy Eyes: Perfect for adding personality to your Grinch cookies.
Why These Tools and Ingredients Matter
Using the right tools and precise ingredients is critical for achieving bakery-quality cookies. The tools ensure even baking and flawless decorating, while the quality of your ingredients impacts flavor, texture, and appearance. For instance, using gel food coloring prevents your dough from becoming too sticky, and heart-shaped sprinkles make your cookies instantly recognizable as Grinch-themed.
With everything prepared, you’re ready to move on to the fun part: baking and decorating your Grinch cookies!
How to Achieve the Perfect Cookie Texture
The texture of your cookies can make or break your Grinch-inspired treats. Whether you prefer soft and chewy cookies or a slightly crispy edge for contrast, achieving the right texture involves a combination of ingredient preparation, baking techniques, and attention to detail. Here’s how to ensure your cookies turn out perfectly every time:
1. Soft and Chewy vs. Crispy: Understanding the Texture Spectrum
The texture of your cookies often depends on the balance of ingredients and how you handle the dough:
- Soft and Chewy Cookies: To achieve a soft texture, focus on using more brown sugar than white sugar in your recipe. Brown sugar contains molasses, which helps retain moisture. Additionally, underbaking by just a minute or two ensures the centers stay tender.
- Crispy Edges with Chewy Centers: If you like a combination of textures, bake your cookies at a slightly higher temperature for a shorter time. This creates crispy edges while keeping the middle chewy.
- Thin and Crispy Cookies: Use melted butter instead of softened butter and reduce the flour slightly. This allows the dough to spread more, creating a thinner, crispier texture.
2. Chilling the Dough: Why It’s a Game-Changer
Chilling the dough is one of the most important steps for achieving the best texture. Here’s why:
- Controls Spreading: When chilled, the butter in the dough solidifies, preventing the cookies from spreading too much in the oven. This helps maintain their shape and keeps them thicker.
- Enhances Flavor and Texture: Letting the dough rest in the fridge allows the flour to fully hydrate and the flavors to deepen, resulting in a richer taste and chewier texture. For the best results, chill the dough for at least 1 hour, or even overnight if time permits.
3. Baking Temperature and Timing Tips
The oven temperature and timing can significantly impact the final texture of your cookies:
- Low and Slow for Chewy Cookies: Bake at a lower temperature (around 325°F/165°C) for a longer time to keep cookies soft and chewy.
- Hot and Fast for Crispy Edges: A higher temperature (350°F-375°F or 175°C-190°C) ensures the edges set quickly, creating a satisfying crispness while leaving the center tender.
- Rotate the Pan for Even Baking: Halfway through baking, rotate your cookie sheet to ensure even heat distribution and consistent texture.
4. Measuring Ingredients Accurately
Precise measurements are crucial to achieving the desired texture:
- Flour: Too much flour can make cookies dense and dry. Use the spoon-and-level method to avoid overpacking your measuring cup.
- Butter: The temperature of your butter matters. Softened butter blends better with sugar for chewy cookies, while melted butter can lead to thinner, crispier cookies.
- Eggs: Ensure eggs are at room temperature. They mix more evenly, contributing to a smoother dough and consistent texture.
5. Cooling for the Perfect Finish
How you cool your cookies affects their final texture:
- Let cookies cool on the baking sheet for a few minutes after removing them from the oven. This allows them to set and prevents breakage.
- Transfer to a wire rack to cool completely, which helps avoid soggy bottoms caused by steam buildup.
By mastering these techniques, you’ll consistently achieve the perfect cookie texture, whether you prefer soft and chewy, crispy, or a delightful combination of both. These tips will ensure your Grinch cookies not only look amazing but taste irresistible too!
Creative Decorating Ideas for Grinch Cookies
Decorating Grinch cookies is where the fun truly begins! These playful, festive treats allow you to let your creativity shine while embracing the iconic Grinch theme. Whether you’re a seasoned baker or a beginner, these decorating tips will help you craft cookies that not only taste delicious but look picture-perfect.
1. Using Green Food Coloring for the Perfect Grinch-Green Shade
The signature Grinch-green hue is key to nailing the look of these cookies. Use high-quality gel food coloring for a vibrant and consistent color. Gel food coloring is ideal because it won’t water down your dough or frosting, ensuring the color stays bold throughout. Start with a small amount of coloring and gradually add more to achieve your desired shade of green. For a whimsical touch, you can even mix in a tiny amount of yellow to make the color pop.
Pro Tip: If you’re making frosting or royal icing for decoration, use the same food coloring to ensure a cohesive look across the cookies.
2. Heart-Shaped Decorations: The Grinch’s Famous Symbol
What’s a Grinch cookie without the iconic red heart? Incorporate heart-shaped decorations to capture the essence of the Grinch’s transformation. Here are a few ideas:
- Heart Sprinkles: Purchase small red heart-shaped sprinkles and press them gently onto the cookie surface before baking.
- Icing Hearts: Use red royal icing or gel pens to pipe tiny hearts onto the cookies after baking.
- Candy Hearts: If you prefer a more textured look, use red candy hearts or fondant cutouts to make the cookies extra special.
Pro Tip: Position the hearts slightly off-center for a playful and unique look that resembles the Grinch’s quirky personality.
3. Adding Fun Touches with Edible Decorations
Take your cookies to the next level with fun, edible embellishments. These details can make your cookies stand out and bring a festive flair:
- Edible Glitter or Luster Dust: Add a shimmer to your cookies with edible glitter or luster dust. A light dusting over the green frosting or dough can create a magical holiday effect.
- Candy Eyes: For a whimsical spin, attach candy eyes to give your Grinch cookies a fun, animated look.
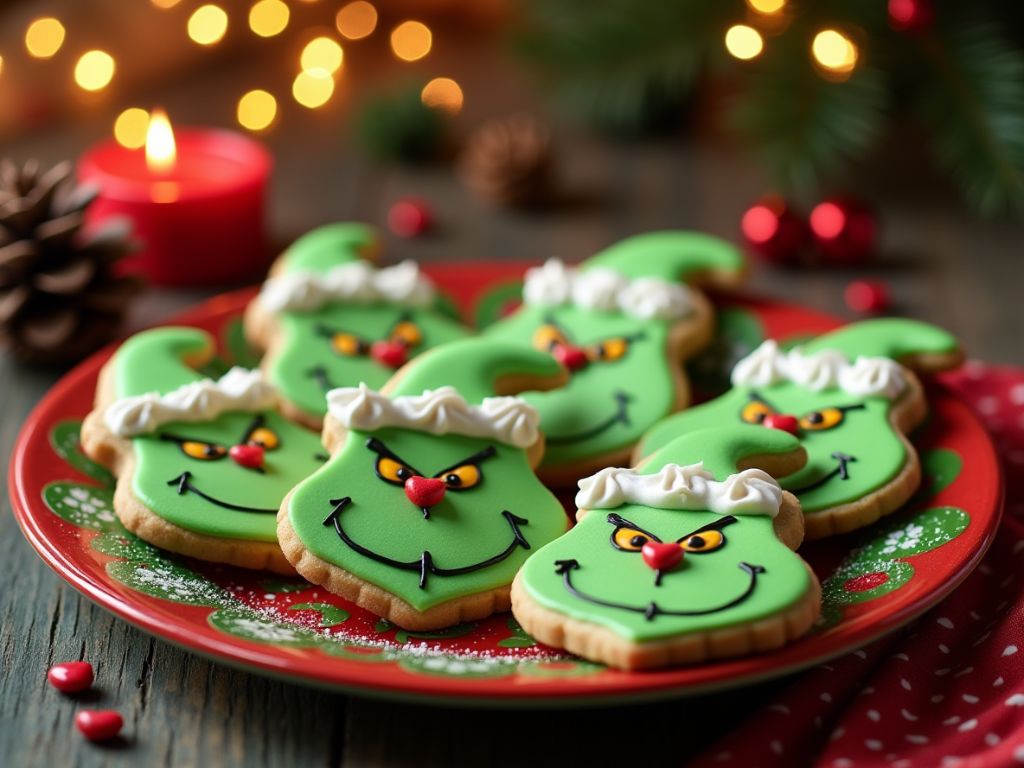
- Piping Faces or Details: Use black, white, or yellow piping icing to draw the Grinch’s mischievous facial expressions. For extra fun, pipe a Santa hat on top of a few cookies.
- Sprinkle Borders: Decorate the edges of your cookies with a mix of red and white sprinkles to give them a festive, framed appearance.

4. Playing with Shapes and Designs
While classic round cookies are perfect for Grinch cookies, consider using cookie cutters to explore different shapes:
- Grinch Face Cutouts: Use a stencil or cutter shaped like the Grinch’s head for a standout design.
- Christmas Trees or Stars: Add a seasonal touch with cookie cutters in tree or star shapes, decorated in green and red.
Pro Tip: Use an offset spatula or toothpick to add intricate details to your cookies after applying icing.
5. Mixing in Other Grinch Elements
If you’re feeling adventurous, incorporate other Grinch-inspired features, like his Santa hat or furry green texture:
- Use red frosting to create a Santa hat on the top of the cookies, complete with white sprinkles for the trim.
- Add a textured look by piping green frosting in swirls or small lines to mimic fur.
With these decorating tips, your cookies will become the star of any holiday gathering. Remember, there’s no right or wrong way to decorate—just have fun and let your creativity flow! Whether you stick with a classic look or experiment with unique touches, your Grinch cookies will bring holiday cheer to anyone who sees (and eats) them.
Troubleshooting Common Cookie Mistakes
Baking cookies can sometimes feel like an art, and even with the best intentions, mistakes can happen. Here are some common issues you might encounter while making Grinch cookies and practical solutions to ensure they turn out perfect every time.
1. Color Fading Issues
One of the defining features of Grinch cookies is their vibrant green color, but sometimes the color can fade during baking. To prevent this:
- Use Gel Food Coloring: Gel-based food coloring is more concentrated than liquid versions, giving you a bold color that holds up better during baking.
- Add a Touch More Color: Mix in slightly more food coloring than you think you need since some fading is natural during baking.
- Bake at Lower Temperatures: High heat can cause colors to dull, so keep your oven at a steady 325°F instead of higher temperatures.
2. Avoiding Dough Spreading
Spreading cookies can lose their intended shape and make your Grinch cookies look more like green blobs than the whimsical creations you envisioned. To fix this:
- Chill the Dough: Refrigerate your cookie dough for at least 30 minutes before baking. Cold dough spreads less in the oven.
- Use Parchment Paper: Line your baking sheet with parchment paper or a silicone mat to reduce spreading and prevent sticking.
- Measure Ingredients Precisely: Too much butter or sugar can cause cookies to spread excessively, so make sure your measurements are accurate.
3. Burned Edges Fixes
Nobody wants cookies that are underdone in the middle and burned around the edges. To avoid this issue:
- Bake in the Middle Rack: Place your baking tray in the middle of the oven for even heat distribution.
- Check the Size of Your Cookies: Ensure all cookies on the tray are roughly the same size so they bake evenly.
- Keep an Eye on Baking Time: Start checking your cookies a minute or two before the recommended bake time. The edges should be lightly golden but not dark.
4. Uneven Cookie Shapes
Sometimes your cookies might bake unevenly, resulting in lopsided Grinch faces. To address this:
- Roll Dough Evenly: Use a rolling pin with adjustable rings to ensure your dough is of consistent thickness.
- Avoid Overhandling the Dough: Excessive rolling and handling can cause uneven textures or cracking.
5. Dry or Crumbly Cookies
If your Grinch cookies turn out dry or crumbly, it can take away from their chewy charm. To keep them soft and tender:
- Don’t Overmix the Dough: Overworking the dough can develop too much gluten, making cookies tough. Mix just until combined.
- Add Moisture: If the dough feels dry, add a teaspoon of milk or cream to restore moisture.
- Store Properly: Place your cookies in an airtight container with a slice of bread to maintain their softness after baking.
Making Grinch Cookies Fun for Everyone
Grinch cookies aren’t just about the final product; they’re about creating lasting memories and enjoying the process of baking with loved ones. This section will help you make the experience enjoyable for everyone involved, whether you’re baking with kids, preparing for a holiday party, or planning to gift your cookies. Here’s how to make your Grinch cookie adventure fun and meaningful:

Kid-Friendly Baking Tips
Baking Grinch cookies is a fantastic way to involve kids in the holiday festivities. Here are a few tips to make the process enjoyable and stress-free:
- Set Up a Decorating Station: Create a special area with all the decorations your little ones might need, such as sprinkles, icing pens, candy eyes, and heart-shaped candies. This not only keeps things organized but also adds excitement for kids.
- Use Simple Recipes: Opt for an easy sugar cookie recipe that’s beginner-friendly. Pre-made dough can also be a great option if you’re short on time.
- Encourage Creativity: Let the kids use their imagination when decorating their cookies. They can make traditional Grinch faces, add funny expressions, or even create their own unique designs.
- Make It a Learning Experience: Teach kids basic baking skills, like rolling out dough, cutting shapes, or mixing colors, while keeping the activity fun and engaging.
Perfect for Holiday Parties
Grinch cookies are a festive addition to any Christmas gathering. Here’s how to make them a highlight of your holiday party:
- Interactive Cookie Stations: Set up a cookie decorating station at your party, where guests can personalize their own Grinch cookies. Provide plenty of icing colors, sprinkles, and other edible decorations.
- Themed Presentation: Arrange your cookies on a platter with a Grinch theme. You could use a green tablecloth, Grinch figurines, or even place a sign that says, “Who-Ville’s Favorite Treats.”
- Pair with Holiday Drinks: Serve your Grinch cookies alongside classic holiday beverages like hot chocolate, eggnog, or mulled cider for a complete festive experience.
- Fun Cookie Contest: Host a friendly competition to see who can decorate the best or most creative Grinch cookie. This adds an extra layer of fun to your event.
Storage and Gifting Ideas
Grinch cookies make delightful holiday gifts, and with proper storage, they’ll stay fresh and delicious. Here are some tips:
- Storing Your Cookies: Place your cookies in an airtight container and store them at room temperature for up to a week. For longer storage, you can freeze the cookies and decorate them after thawing.
- Festive Packaging: Use holiday-themed tins, mason jars, or decorative boxes to package your Grinch cookies. Add a festive ribbon or a Grinch-inspired tag for a personal touch.
- Custom Cookie Gifts: Include your Grinch cookies as part of a holiday gift basket with other treats like hot chocolate packets, mini marshmallows, and a small holiday mug.
- Handwritten Notes: Add a handwritten note with a Grinch-themed message, such as “May your heart grow three sizes as you enjoy these treats!”
By following these tips, you can turn your Grinch cookie-making session into a joyful experience for everyone. Whether it’s spending quality time with your family, hosting a memorable holiday party, or spreading cheer through thoughtful gifts, these cookies are more than just a treat—they’re a way to celebrate the magic of the season together.
Try out these Grinch Cookies and let your creativity shine! We’d love to see your sweet creations. Tag us on Instagram at @SweetEatsRecipes and use the hashtag #GrinchCookies to get featured.

